![]()
OVERVIEW AND RESOURCES
LAST UPDATED ON FEBRUARY 10TH 2023.
OVERVIEW
Some general details:
The idea for the Mega Engine system started back in the summer of 2020 and was basically born out of frustration over the fact that no
small cases for housing an optical disc drive next to a low power SOC (system on a chip) were available. Mega Engine's emulation cores are based
on Retroarch, which has matured over the past years to offer great performance for a very wide variety of systems. The ME's hardware is comprised of
standard hardware parts as far as possible. Its 64bit quad-core 1.4Ghz Cortex-A53 processor provides perfect performance for all its target platforms
like PC Engine, Mega Drive and other 8 and 16-bit systems. Of course the system is completely upgradeable in terms of both hardware and software.
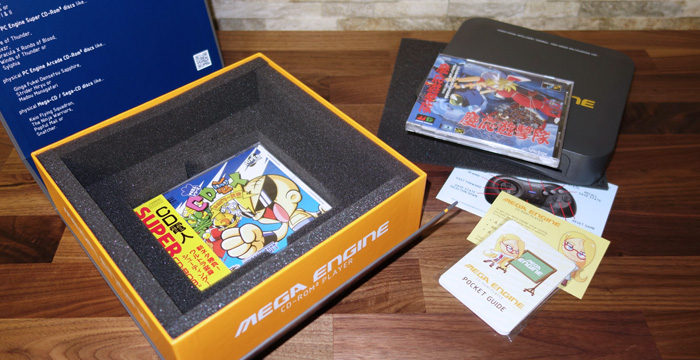
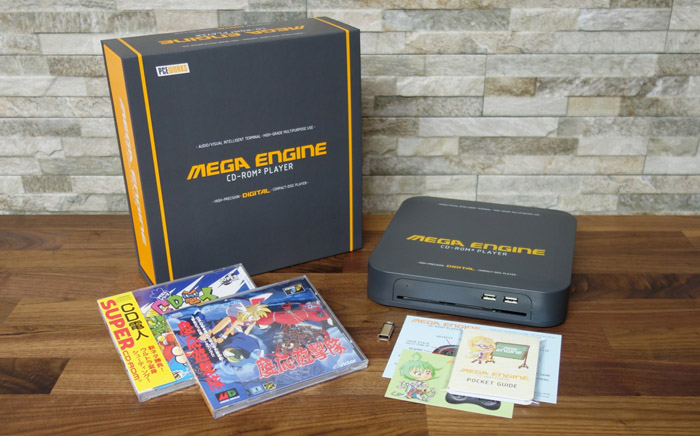
What's in the box:
We not only created ME to be a fun and useful tool, but also to be a beautiful collector's piece. The heavy duty cardboard box is lined with a protective foam
insert and next to the actual core system in either grey or white you'll find a printed full color foldout manual (pocket guide) along with a quick
reference card for the controller layout inside the box. Included are two pieces of software to demonstrate the system (CD Denjin for the PC Engine and Keio Yugekitai
for the Mega-CD). We decided to include these two games with the system to
offset the majority of the international shipping costs and make the pricing more transparent to users all around the globe. There is no controller and no
power supply or HDMI cable included. Please check the Getting Started section below for details on recommended accessories.
Availability and Ordering
Availability:
Fully build units are sold out. A handful of DIY-kits are still available in stock. DIY-kits are 179 EUR incl. shipping.
We don't plan to offer to any more units after the initial amount has been sold.
Shipping status:
New orders are currently shipped within ONE week of your payment.
A word on the DIY-kits:
The DIY-kits from the first batch contain everything the fully built units contain. Build time for a unit is around 20 minutes. A printed (and illustrated) build
guide is included of course. If you ever built a small Lego technics set, this will be easy for you and there's no soldering required. Offering a part of the first batch as DIY-kits allows us to focus on shipping instead. DIY-kits are priced at 179 instead of 199 EUR.
Future plans for another batch?
We currently have no plans on offering an additional batch. If you like great collectibles, don't
hesitate to get a unit now!
How to order?
If you like to purchase a unit, you can simply email us or you can use the quick order form by clicking on the PURCHASE link on top of the page.
Getting Started
What you need to get started:
In addition to the system, you need three additional items: a HDMI cable, a controller and a matching power supply.
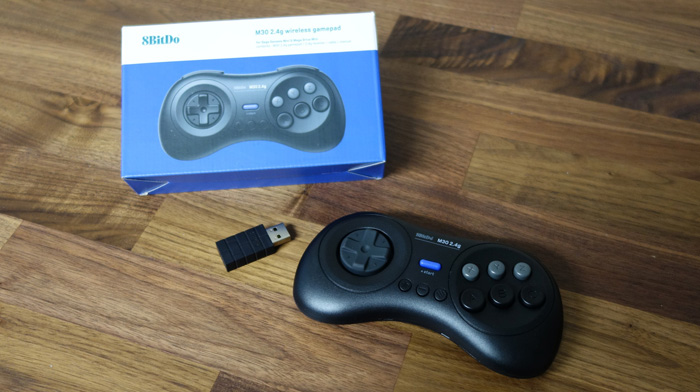
Recommended controller:
Our recommended controller is the 8BitDo M30, especially the 2.4GHz version with included USB dongle. Of course basically every
other USB controller will also work on the system. Using bluetooth controllers (8Bitdo, Playstation, XBox, Switch) works fine as well, but
for the initial setup you'll prefer to use a wired controller (or one with its own 2.4GHz RF dongle).
8BitDo M30 2.4Ghz at Amazon.de
8BitDo M30 2.4Ghz at Amazon.com
Recommended power supplies:
The ME requires a Micro USB power supply with an output between 5.1 and 5.25V at 3A. For North American users the Argon ONE
Raspberry Pi UL power supply is recommended. For European users the linked Taifu (or KFD) power supply is recommended. Any other power supply
matching the required specs will be fine as well of course. The system comes with a USB-C to Micro USB adapter dongle, which allows
you to use an official Raspberry Pi 4 power supply, but in the long run a matching Micro USB power supply makes more sense.
Taifu PSU at Amazon.de
KFD PSU at Amazon.co.uk
Argon One PSU at Amazon.com
Do not try to use a USB charger. USB chargers (even strong ones with USB-C) are limited to 2.4A of power. The system might seem to boot up fine, but you will be running into problems with the optical disc drive.
Additional Resources
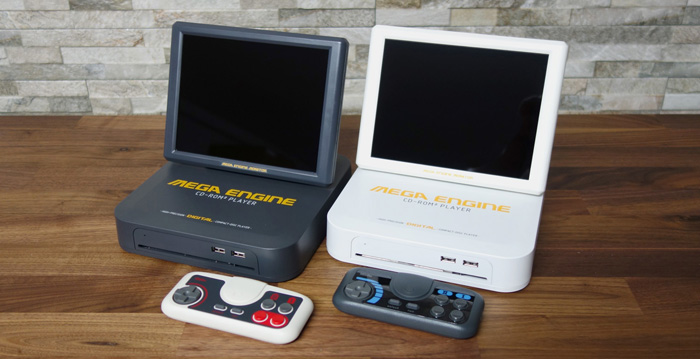
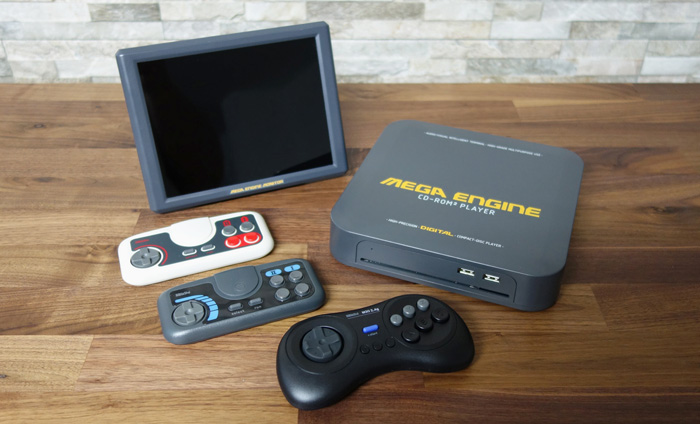
What about those lovely small LCD monitors?
Unfortunately just a proof of concept. The monitor you see here is the Vilros 8" LCD screen, an 4:3 IPS display with a resolution
of 1024x768 and available through Amazon. RAL7024 (graphite grey) is a rather close match the color of the grey ME unit. The Vilros
monitor is easy to disassemble. Should you want to try this, use a can of matte spray paint.
Vilros 8 directly from the manufacturer (US only)
Vilros 8" IPS LCD at Amazon.de
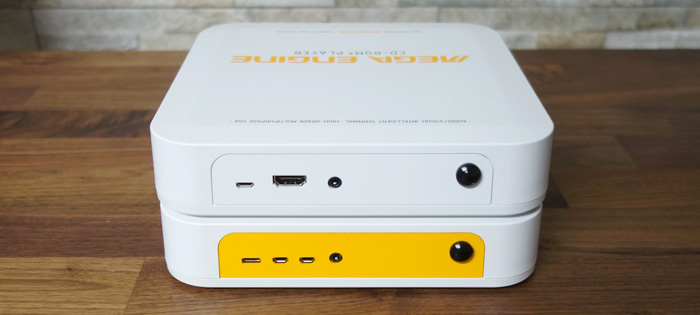
What about upgrading the system?
The system can be upgraded to basically any SOC you like (or at least anything that has the same form factor as a Raspberry Pi).
On the picture above you see a regular white Mega Engine unit on top and a supercharged unit (with a Pi 4 installed) on the bottom.
The back plate of the system is replaceable. Pi4 Back Plates are sold out, but files for 3D printing your own back panel can be found
right here.
Back Plate for Pi4 SOC (STL and STEP files)
Going with a stronger SOC than the installed one might require active cooling. A recommended heatsink along with a low-profile fan for the Raspberry Pi 4 is this one by Geekworm:
Geekworm Pi4 cooling solution at Amazon.de
Downloading the operating system:
The ME's operating system is a tweaked version of Retropie, which itself is based on Raspbian (Linux), EmulationStation
(frontend) and Retroarch (emulation framework). Of course you can download the image for free using the links below (torrent client required).
The image is available in three versions. These are identical, except they're preset for different kinds of displays. You need to decompress the files and burn
the resulting .img file to a micro SD card using Etcher.
OS image file (preset for HD output to HDMI displays)
OS image file (preset for 15khz component output to CRTs)
OS image file (preset for 15khz RGB output to CRTs)

Hardware required for connecting a CRT:
Mega Engine is preconfigured to be run on a 15khz CRT monitor in glorious 240p. You can easily switch between HDMI operation in HD and low-res operation on
a classic CRT TV or monitor. To connect the ME to a CRT using a component connection (this includes PVM/BVM monitors and a lot of North American CRT
sets), we recommend the Portta HDMI to component converter, which is easily available from Amazon. This is a straight DAC that simply converts the ME's HDMI
output 1:1 into an analogue component signal without additional processing or scaling. For connecting to RGB monitors instead your start should be the Portta HDMI to VGA converter, again easily available
from Amazon. This will provide you with a 15khz RGBHV output. Should you want to run the ME on a Scart-RGB television set, you additionally need a
HD15 to Scart sync combiner, but better get in touch with us first to confirm compatibility of your TV with any specific converter. Some options are listed below.
Portta HDMI to component at Amazon.de
Portta HDMI to component at Amazon.com
Portta HDMI to VGA at Amazon.co.uk
Portta HDMI to VGA at Amazon.com
Rondo HD15-2-Scart Sync Converter at Castlemania Games
Tim Worthington's VGA to Scart Adapter
Arcade Forge Ultimate SCART Adapter
Retro Upgrades VGA2Scart Sync Converter
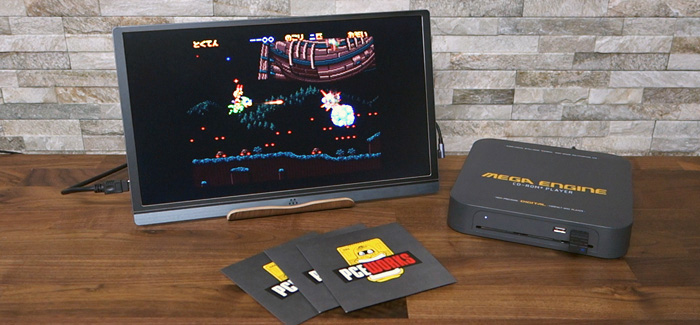
Demonstration videos:
Here we have compiled three short videos to give you a quick impression of the system running. One video goes through the pre-installed emulators,
while the second one demonstrates the loading of a physical Mega CD disc and the third one shows the same for a physical PC Engine CD-Rom disc. We will be moving
the videos to YouTube eventually, but at the moment we can only offer a file download via torrent. The three files combined are 823 MB in size. These are
in 720p format (h264 codec).
Mega Engine demo clips in 720p
Download the User Guide and Build Guide:
A printed version of the user guide comes with every system, while the build guide is only included with the DIY-KITS.
Of course you can still download both right here. The build guide comes in handy, if you need to fix anything, or if you want to
learn about the internal structure (e.g. when you want to upgrade the storage or replace the SoC board).
Mega Engine USER GUIDE (PDF)
Mega Engine BUILD GUIDE (PDF)
on compatibility and step-by-step guides to adding
more roms or setting up your controllers.
